My Love Affair with Garlic

Garlic is one of those things that, when I read a recipe and it calls for 1 clove, I use at least two. I’m OBSESSED - it’s a problem!

History of Garlic
Garlic is among the oldest known horticultural crops. In the Old World, Egyptian and Indian cultures referred to garlic 5000 years ago and there is clear historical evidence for its use by the Babylonians 4500 years ago and by the Chinese 2000 years ago.
“Garlic Speak”
Many people struggle with “garlic speak”. One of the most commonly Googled questions in the cooking world is, “How much minced garlic equals 1 clove?” Well, it's not cut and dry: It depends on how finely minced the garlic is, and even if the chop is standardized, clove size may vary.
Let’s first be clear about terms used when referring to garlic: Garlic grows in large papery heads. The large bulb of garlic you buy is NOT one 'clove. ' The whole garlic is called a ‘bulb’, ‘head’ or ‘knob’. Each small, individual segment of a garlic head is a clove.


*Laurie’s Tip: Jarred garlic is ok. But, don’t be intimidated by using fresh garlic! Some people are intimidated because it seems like a 3D puzzle. Don’t know how to get to the fresh garlic? It’s not as difficult as it may seem. Depending on whether or not you want whole or chopped cloves, there are a variety of ways to peel a head of garlic, but I’m going to show you how to peel with a knife.
Get a garlic bulb and separate a clove. Simply pull one off the cluster with your finger tips. Peel away the loose, papery white skin to make this easier.
Cut away the top of the garlic. If there is a hard, thin brown "top" on the clove, slice it away with your kitchen knife. This makes peeling slightly easier, but it is not strictly necessary, and some cloves will not have much of a stub to remove. (You can also cut the clove in half. This may make it easier to ultimately remove the skins.)
Place the clove on a chopping board. Lay it flat side down, so that the part of the clove that was nearest to the center of the head faces away from you.
Place the flat side of the knife on the clove and push down firmly. You want a quick, firm strike with the heel of your hand. You'll hear a light crunch. Remove the blade to see the skin detached from the clove.
Peel away the skin and waste with your hands. You may need to practice a bit to learn how much pressure you can apply, but when you lift the knife you'll find that the skin comes right off.
Use the peeled clove, either chopped or full. Your clove is now ready for cooking.


*Laurie’s Storage Tip: Store garlic heads in a cool, dry, well-ventilated place (not the refrigerator). Keep it in a dark drawer or container to help keep it from sprouting or drying out quickly. Discard garlic if it feels empty or soft.
Roasting Garlic
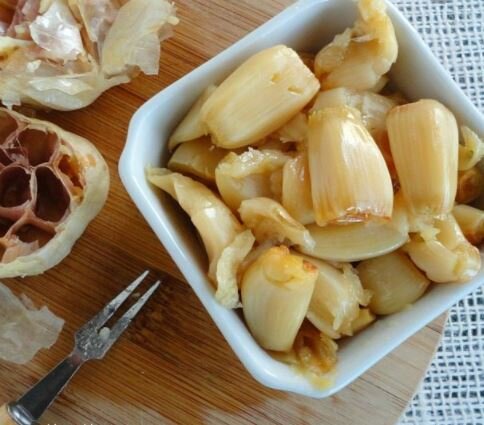
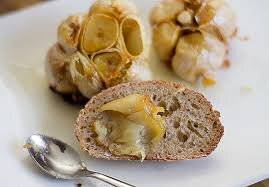
I love to roast my own garlic! I eat the roasted cloves directly out of the heads, or add them to pasta dishes, mash them up and spread them over toast, or mix them with sour cream for a dip.
If you are sensitive to raw garlic, you may find that you can much more easily eat roasted garlic.
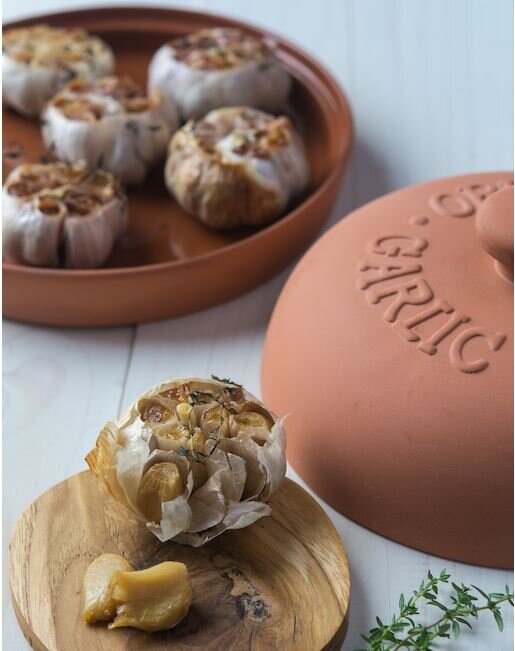
I have a terracotta garlic roaster, but you don’t have to have one; you can use aluminum foil, a shallow baking pan, muffin tin or cast-iron skillet.

Ingredients
One or more whole heads of garlic
Extra virgin olive oil
Directions
1. Preheat your oven to 400°F.
2. Peel and discard the loose, papery outer layers of the whole garlic bulb, leaving intact the skins of the individual cloves of garlic.
3. Using a sharp knife, cut 1/4 to a 1/2 inch from the top of cloves, exposing the individual cloves of garlic.
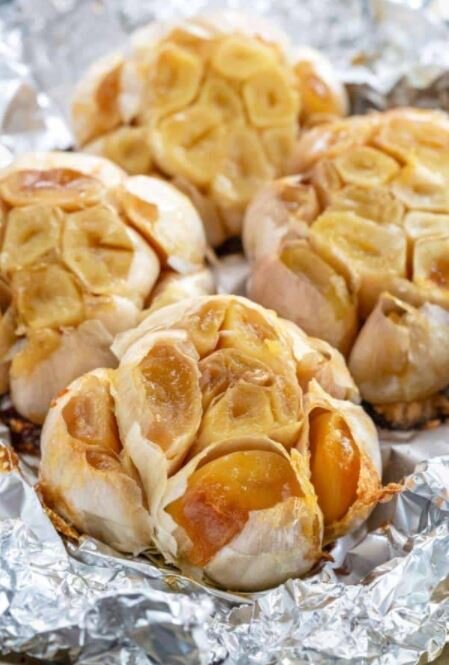
4. Put garlic in pan, foil, etc. placing the garlic heads, cut side up. (A muffin pan works great for this, as it keeps the garlic bulbs from rolling around.)
5. Drizzle with a couple teaspoons of olive oil over each exposed head, using your fingers to rub the olive oil over all the cut, exposed garlic cloves.
6. Cover the bulbs with aluminum foil or lid.
7. Bake at 400°F for 40 minutes, or until the cloves are lightly browned and feel soft when pressed.
8. Cool and remove roasted garlic cloves from their skins. Allow the garlic to cool enough so you can touch it without burning yourself. Use a small small knife to cut the skin slightly around each clove. Use a cocktail fork or your fingers to pull or squeeze the roasted garlic cloves out of their skins. SO GOOD!!!